Direct flash vs bounce flash: which one should I use?
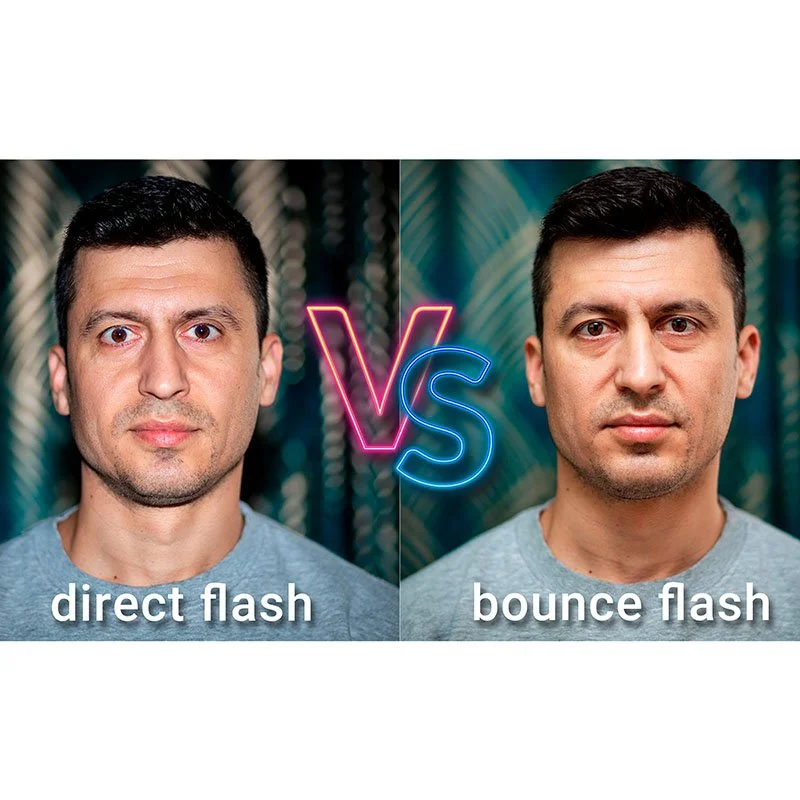
direct flash vs bounce flash
Flash photography is a vital technique for photographers, allowing them to capture well-lit images in low-light conditions. However, the type of flash you use can significantly impact the quality of your photos. In this article, we'll explore two common flash techniques—direct flash and bounce flash—to help you decide which one to use. Understanding the differences and applications of direct flash vs bounce flash can elevate your photography skills and ensure you get the best results in various shooting scenarios.
What is direct flash?
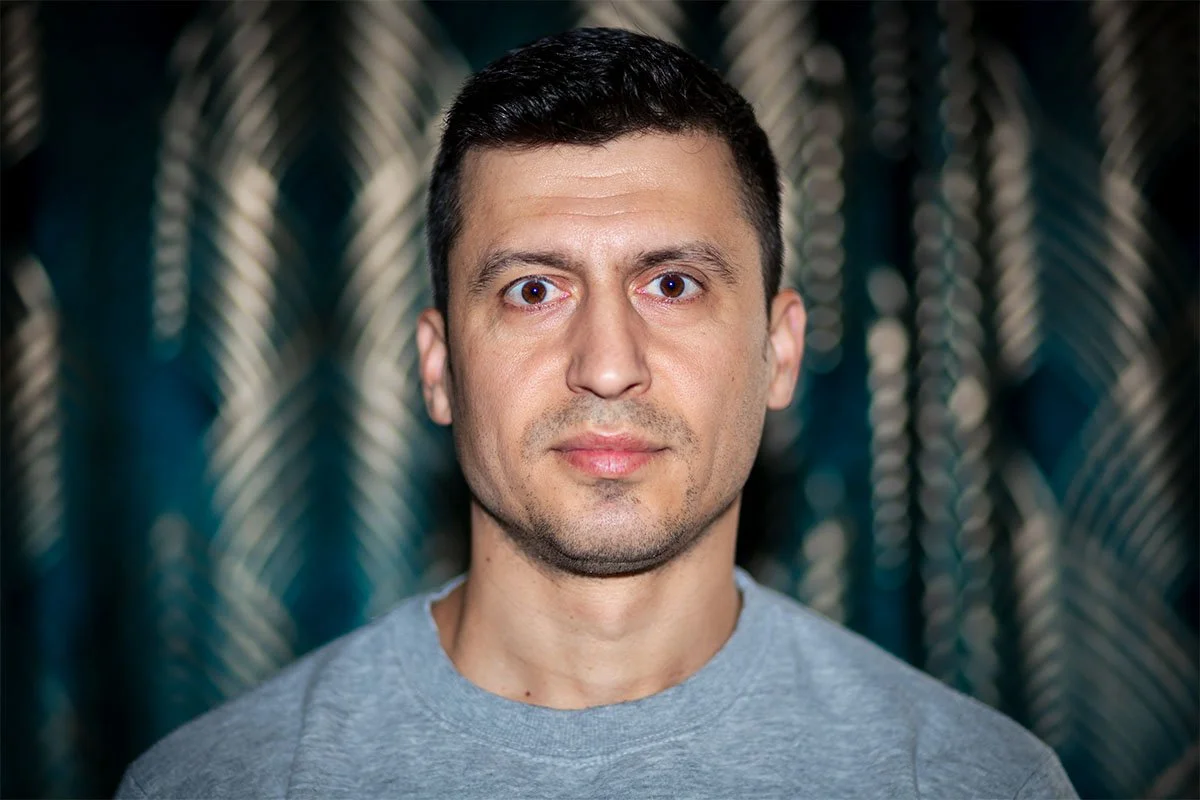
direct flash sample image
Direct flash refers to the technique of pointing the flash directly at the subject.
This method provides a straightforward approach to illuminating your subject, often resulting in a bright lit photo and it’s often used by beginner photographers due to its simplicity.
However, direct flash can sometimes produce harsh shadows and a less natural look.
How direct flash works:
The flash unit emits a light straight towards the subject, creating a strong light source that minimizes ambient light interference.
This technique is commonly used in scenarios where there is insufficient natural light, and the photographer needs to ensure the subject is well-lit, such as event photography, night clubs or dance floors.
Advantages and disadvantages of direct flash:
PROS:
provides strong, direct light to the subject.
simple to use and requires minimal adjustment.
effective in low-light situations.
CONS:
can create harsh shadows and highlights.
may result in red-eye effect.
often produces less natural-looking photos.
When to use direct flash:
Ideal scenarios:
low-light environments where strong light is needed.
action or event photography requiring quick illumination.
situations where bounce surfaces are unavailable.
Tips for use:
use diffusers to soften the light.
experiment with flash power settings.
be mindful of the red-eye effect and use red-eye reduction modes.
Common mistakes to avoid:
over-reliance on direct flash in inappropriate settings.
overexposure
forgetting to adjust flash settings according to the environment.
What is bounce flash?

bouncing flash off ceiling sample image
Bounce flash involves directing the flash towards a surface, such as a ceiling or wall, to diffuse the light before it reaches the subject.
This technique softens the light, reducing harsh shadows and creating a more natural lighting effect.
How bounce flash works:
When using bounce flash, the photographer angles the flash head towards a reflective surface, such as a white wall or ceiling.
The light bounces off this surface and spreads out the light from the flashgun, providing a softer and more diffused light on the subject.
As mentioned, a common practice is bouncing flash off the white wall or ceiling, which evenly distributes light throughout the scene, in some cases both to the subject/s and ambient light.
There are cases when you don’t meet a white surface on some locations and you need to use different alternatives options such as flash diffusers, domes, soft boxes, spheres, etc. to lit up the subjects.
DO’s and DONT’s of bounce flash:
PLUSES:
produces softer, more natural-looking light.
reduces harsh shadows and highlights.
can create a more flattering image of the subject.
MINUSES:
requires a suitable reflective surface.
can be less effective in large, open spaces.
more complex to set up and adjust.
Direct flash vs bounce flash: key differences:
Light quality: direct flash offers concentrated, intense light, while bounce flash diffuses light, creating a softer effect.
Impact on shadows and highlights: direct flash can produce harsh shadows and pronounced highlights. In contrast, bounce flash minimizes these effects, resulting in a more balanced light distribution.
Effects on subject: subjects lit with direct flash may appear less natural due to the bright lighting. Bounce flash typically results in a more flattering and natural appearance.
Considerations: direct flash is often more suitable for outdoor and action photography, where quick and powerful light is needed. Bounce flash is ideal for indoor settings, especially in portrait and event photography, where soft lighting enhances the subject's appearance.
When to use bounce flash:
Ideal scenarios:
indoor photography with available bounce surfaces.
portrait photography where soft light enhances the subject.
event photography in smaller, controlled spaces.
Tips for use:
experiment with different bounce angles.
use white or neutral-colored surfaces to avoid color casts.
combine bounce flash with ambient light for balanced exposure.
Common mistakes to avoid:
using unsuitable surfaces that absorb rather than reflect light.
not adjusting the flash power for different surfaces and distances.
forgetting to monitor the balance between flash and ambient light.
Practical tips for using flash effectively:
Understanding your flash equipment: familiarize yourself with your flash unit’s features and settings to maximize its potential.
Experimenting and practicing with angles and surfaces: try different bounce angles and surfaces to see how they affect your photos. This experimentation can lead to more creative and professional results.
Balancing flash with ambient light: combine flash with natural or ambient light to achieve a more natural look. This technique can help maintain the atmosphere of the scene while the subject is still well lit.
Editing the images: While editing is not always mandatory, it can significantly improve the quality and professionalism of your flash photography. Editing your images in flash photography can enhance their quality and address common issues associated with using flash.
Conclusion
Choosing between direct flash vs bounce flash depends on your specific needs and shooting conditions. As I mentioned above, direct flash offers straightforward and intense lighting suitable for many situations, while bounce flash provides softer and more natural light ideal for portraits and indoor settings. Experiment with both techniques to find what works best for you and improve your photography skills to a PRO level.
Looking for a Northampton photographer?
Capture your moments in Northampton with stunning photography that tells your story. Whether it's a wedding, baptism, special event or portrait, your wedding photographer in Northampton combines creativity and skill to deliver stunning images.
Contact me for more details.
FAQs
-
Direct flash points the light directly at the subject, while bounce flash redirects the light off a surface for a softer effect.
-
Yes, combining both techniques can create unique lighting effects, but it requires careful adjustment to balance the light.
-
Bounce flash often requires higher power settings and adjustments in exposure due to the light loss during bouncing.
-
Use red-eye reduction modes, diffuse the flash, or position the flash away from the camera lens to minimize red-eye.
-
A direct flash creates a harsh contrast between your subject and the background, making your photos look artificial and unnatural. A bounce flash, it allows the light to spread and soften the subject by reflecting it off a large surface.
-
The recommended angle to bounce the flash is at a 45 degree angle, being used this technique 95% most of the photographers at events, such as weddings.
Have you recently photographed a party and missed the chance to put your creativity into your photos?
No worries cause I’ve got your back with these Drag The Shutter overlays for Photoshop.
These overlays aims to elevate your photography to the new heights and give that WOW factor to your photos. The Drag The Sgutter overlays for Photoshop offers a dynamic range of orange, blue, magenta and green toned overlays meticulously crafted to enhance the atmosphere of your photos by introducing captivating visual effects.


