Understanding your camera settings: A guide for beginner photographers
Introduction
You can capture and share the beauty of the world around you through the amazing journey of photography, but knowing your camera's menu and all the features may initially appear complicated to a beginner, as well as doing as an essential first step in maximizing your creative potential. In order to give you the ability to take command of your camera and create beautiful pictures, this article seeks to make you understand your camera base settings, such as ISO, aperture, and shutter speed.
Understanding your camera settings is essential for every photographer, whether you’re capturing landscapes, portraits, or important life events. For me, as a wedding photographer in Northampton, mastering ISO, aperture, and shutter speed helps me ensure emotions, details, and raw moments are beautifully captured under a variety of lighting situations.

camera low 100 ISO value
Sensitivity to light (ISO)
The term ISO describes how sensitive to light your camera sensor is. For well-lit conditions, a low ISO setting (such ISO 100) produces clear, noise-free photographs. However, a high ISO setting (such as ISO 1600 or higher) is appropriate for low-light conditions but can cause noise or graininess in your images. It's crucial to get the ideal balance between ISO and lighting.

camera max aperture value
Aperture: Depth of Field (DoF) and light control
The size of the opening in the lens through which light enters the camera is determined by the aperture, which is measured in f-stops (for example, f/1.8, f/8, f32).
Depth of field and light control are the two key characteristics that are impacted (see how aperture affects your images).
A shallow depth of field is produced with a wide aperture (small f-number), such as f/1.8, which keeps your subject sharp while blurring the background, so essential and great for portrait photography.
For landscape photography, a shallow depth of field (high f-number) like f/11 or greater improves the amount of the scene that is in focus.
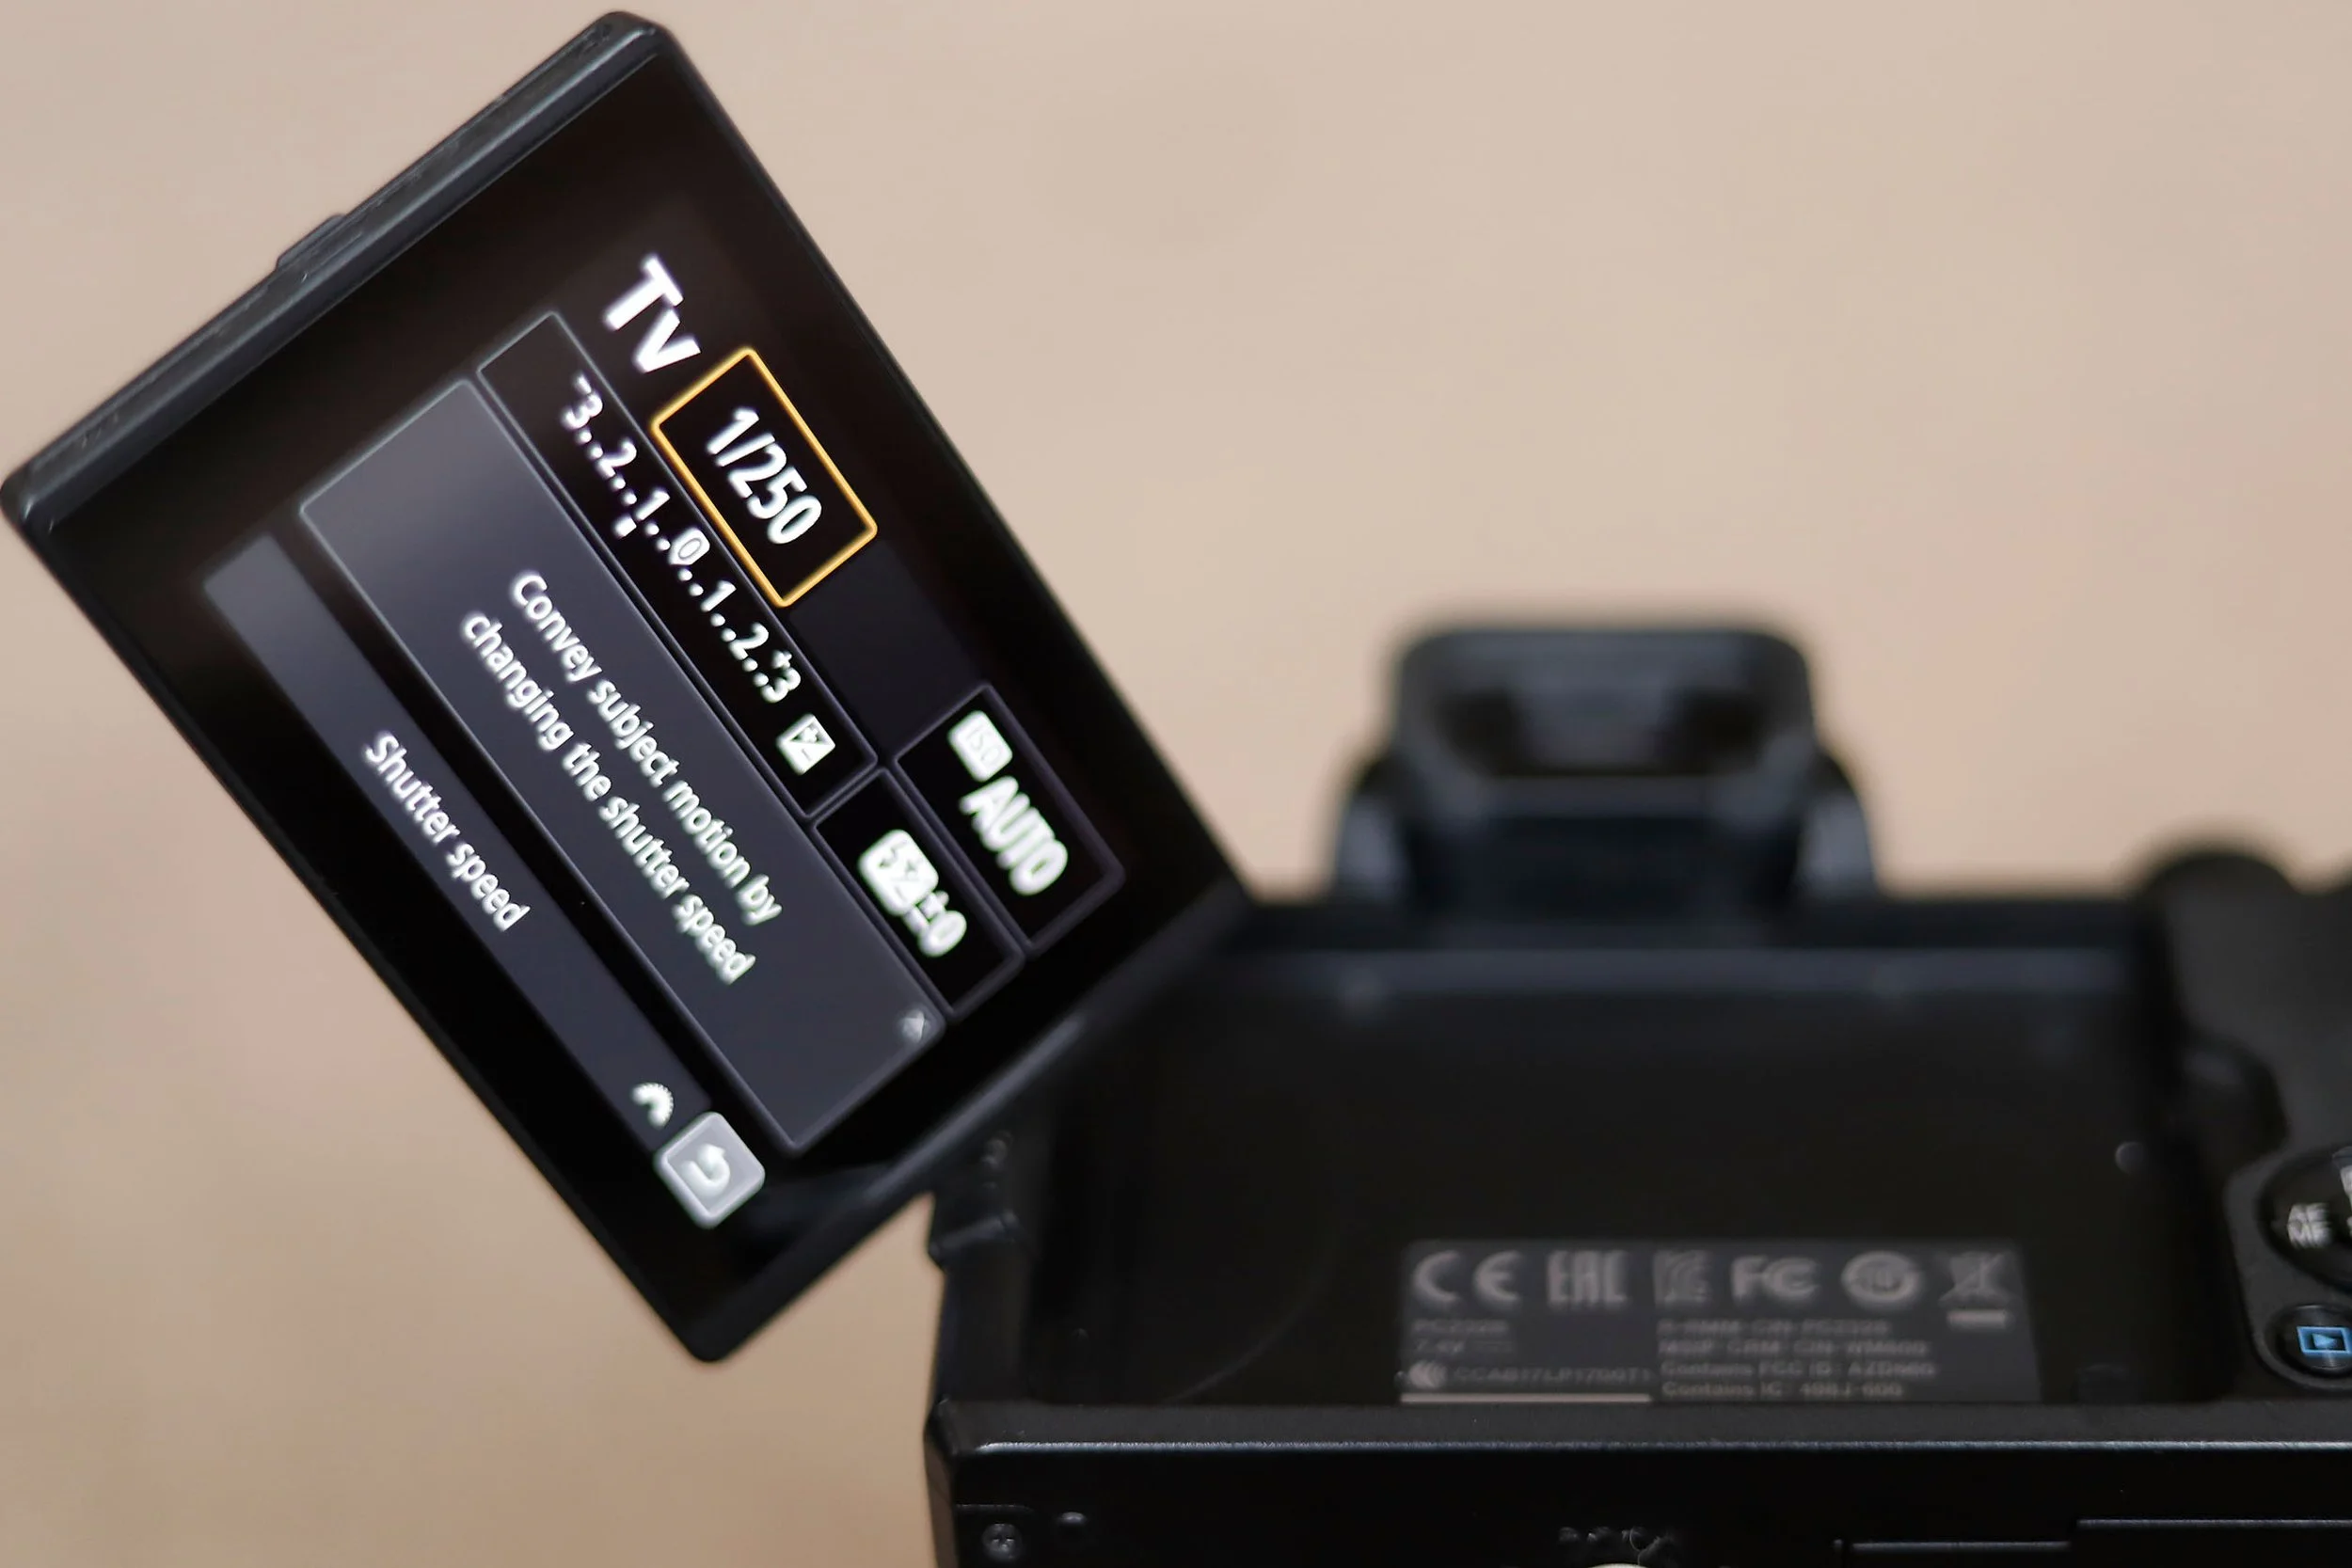
camera shutter speed
Shutter Speed: Freezing or blurring the motion
How long your camera's sensor is exposed to light is determined by the shutter speed.
While a slow shutter speed (such as 1/30 seconds) produces motion blur, which is good for capturing the flow of water or artistic effects, a high shutter speed (such as 1/1000 seconds) freezes rapidly moving images, such as sports or animals.
To achieve the ideal effect without adding extra blur, it's critical to match the shutter speed with your subject's movement.
The Exposure Triangle: Finding the balance
ISO, aperture and shutter speed are combined to form the exposure triangle.
Getting the right exposure requires finding the perfect balance between these three settings.
For example, if you increase the aperture to let in more light, you may need to lower the ISO or use a faster shutter speed to compensate.
Modern cameras often have semi-automatic modes (aperture priority, shutter priority) that allow you to control certain settings while maintaining this balance.
Practical tips for beginners:
Start in Auto Mode
If you're new to photography, the camera's automatic mode will help you get used to its capabilities. After time of practicing, once you feel confident, experiment with manual settings step by step.

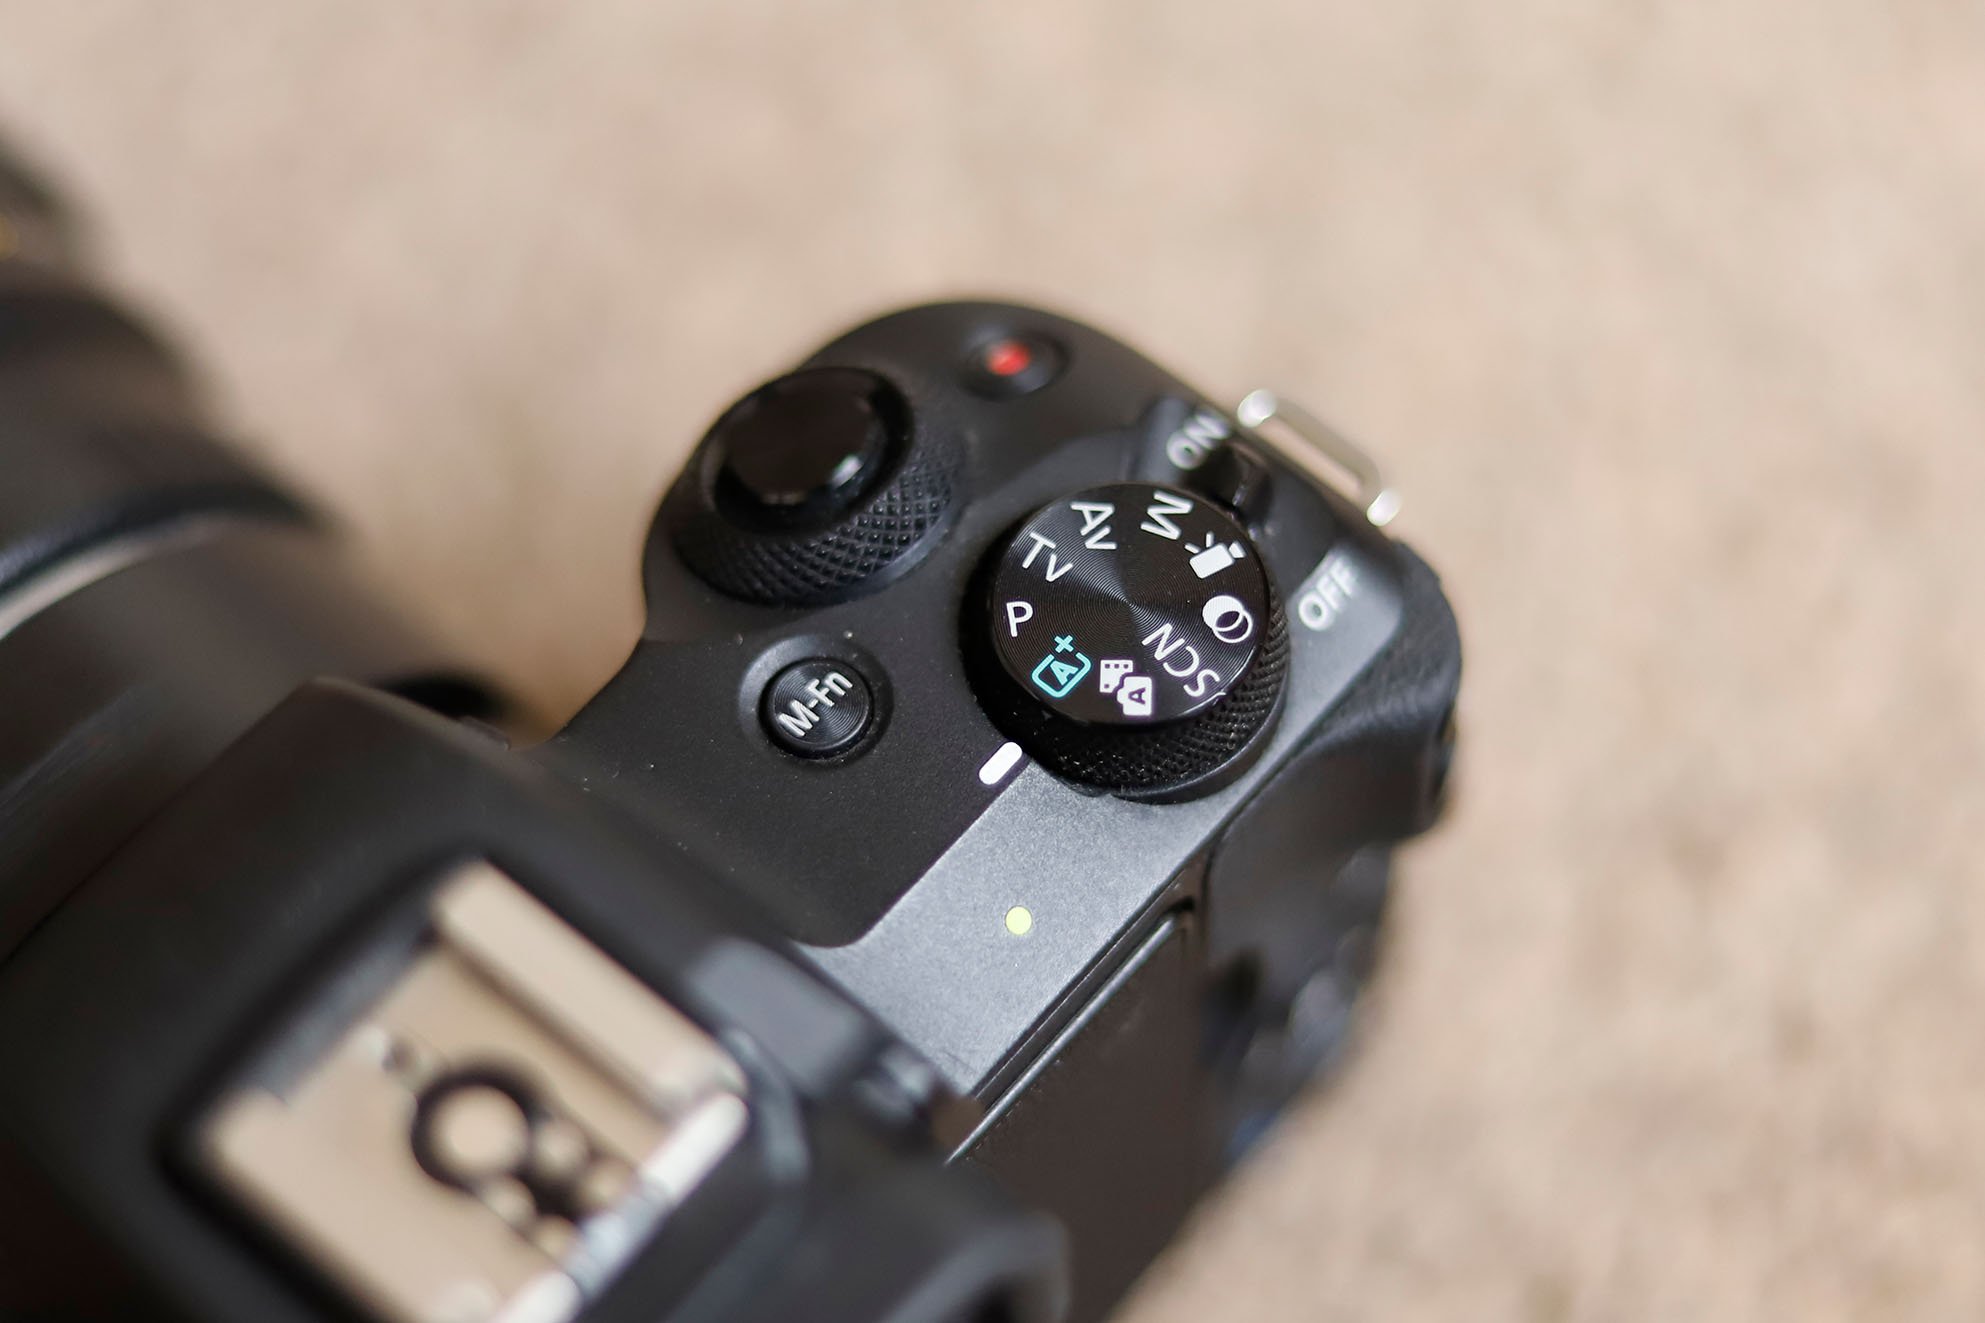
Master the mode: aperture priority
Aperture priority (Av on Canon, A on Nikon) allows you to control depth of field while your camera is adjusting the other settings to ensure the camera is properly exposed, so you can focus on your creative compositions.
Try out this settings: dial your camera to Aperture Priority mode, set your ISO to AUTO, set your white balance according to your ambient light for more vibrant colours (e.g. cloudy, daylight, shade) and set your AF to ONE SHOT mode for your still subjects.

Practice Shutter Priority Mode:
Shutter Priority (Tv for Canon, S for Nikon) is great for capturing moving subjects. Set your desired shutter speed and the camera will adjust the aperture for the correct exposure.
Try out this settings: dial your camera to Shutter Priority mode, set your ISO to AUTO, set your white balance according to your ambient light for more vibrant colours (e.g. cloudy, daylight, shade), set your AF to AI SERVO for moving subjects and set your drive mode to high speed continuous.

Understand Your Camera's Light Meter:
Most cameras have a light meter to help you gauge whether your settings will result in a correctly exposed image. Try to keep the pointer at or near the center for a balanced exposure.
Experiment and review: Don't be afraid to experiment with different settings and review your results. Modern digital cameras allow you to see your image immediately, enabling you to learn from your shots and adjust accordingly.
Conclusion
To understand your camera’s settings is a foundational step in your photography journey. The interplay between ISO, aperture, and shutter speed empowers you to capture images that reflect your creative vision. Start with the basics, and as you become more comfortable, delve deeper into the world of photography techniques. Remember, practice makes you better (not perfect), so grab your camera and start capturing the beauty that surrounds you.
Camera settings form the backbone of confident photography, from day-to-day snapshots to professional work in the nearest future. If you’re serious about turning your skills into a career or improving how you capture important moments (like weddings), consider how these settings apply in real scenarios. As a Northampton-based documentary wedding photographer, I use these fundamentals daily to deliver unforgettable images in challenging lighting conditions.